Monthly routine
Run this after Patch Tuesday (the second Tuesday). Each step says where it runs and whether it is mouse or command. Scripts are in Script library. Expect about 2 hours elapsed, mostly waiting.
The one-line version
Sync online, check size, take a checkpoint, approve, download, verify, export the catalog, carry the new files, verify, import, trim, approve offline, test on one client, then roll out.
-
Sync the online WSUS GUI
Online server, WSUS console
Click Synchronizations in the left tree. In the Actions pane click 1 Synchronize Now. The sync appears in the list. Wait until its Result column says Succeeded. Never do this on the offline server.
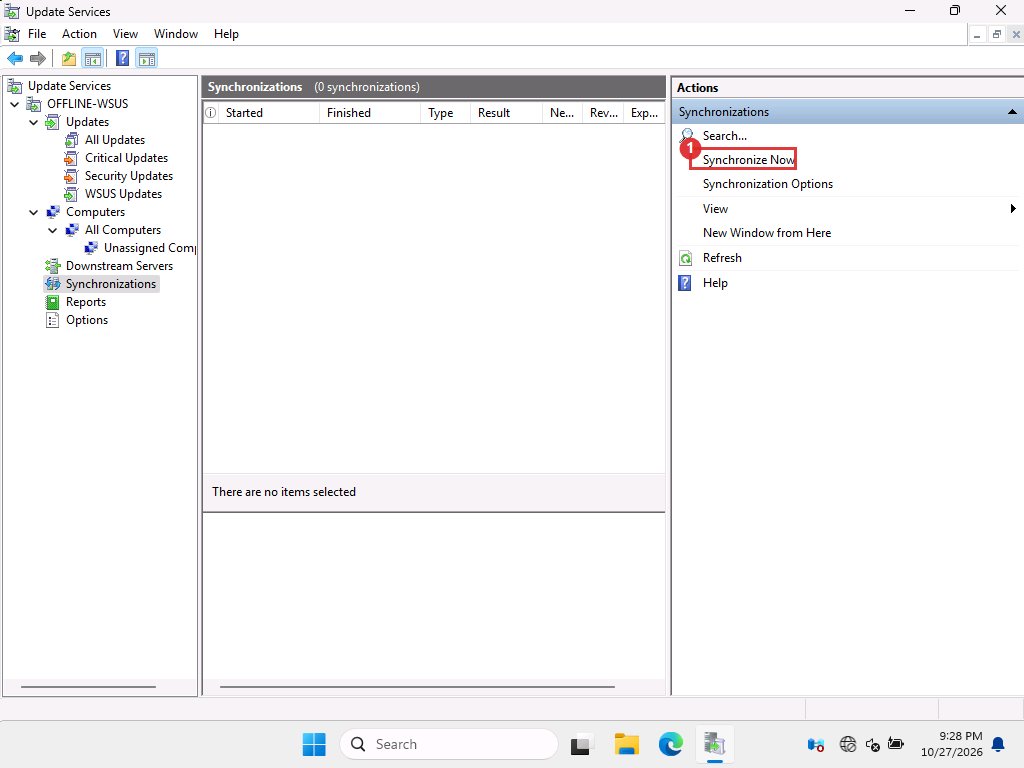
Synchronizations page. On the offline server this list stays empty, which is correct. -
Find the month's update GUI
Online server, WSUS console
Click Updates, then All Updates. Set the 1 Approval drop-down to 1 Unapproved and click Refresh. Windows 11 monthly updates are titled YYYY-MM Cumulative Update for Windows 11, version 25H2 for x64-based Systems.
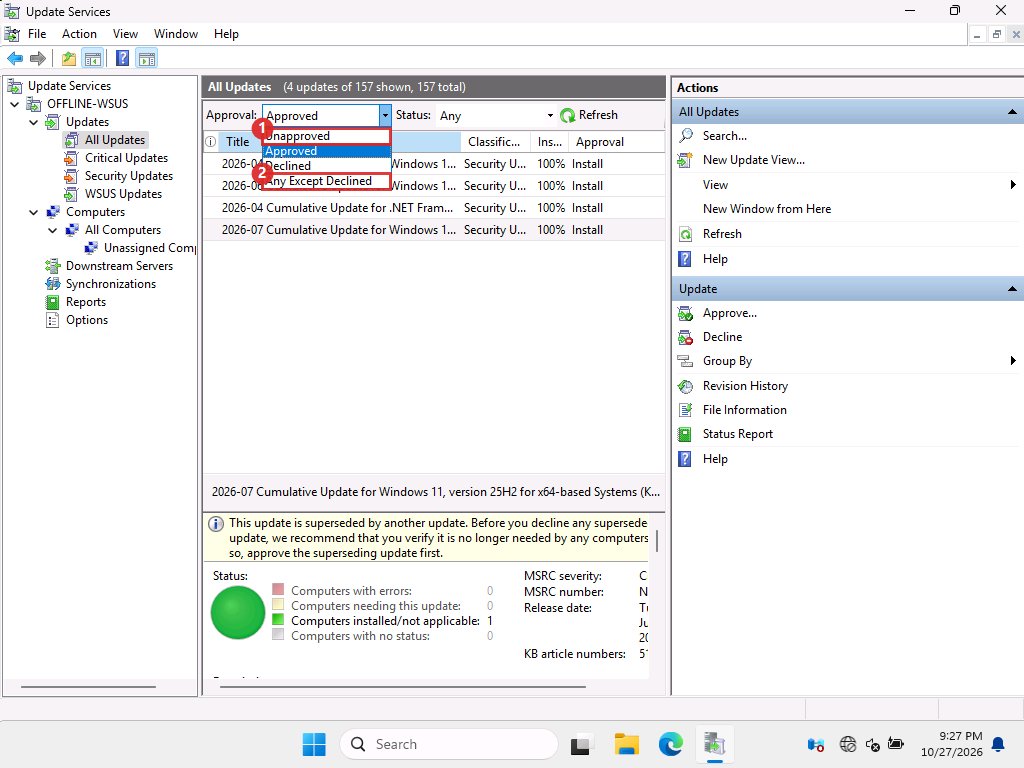
Approval filter. Choices: Unapproved, Approved, Declined, Any Except Declined. To jump straight to one, click Search… in the Actions pane, type the KB number, then Find Now.
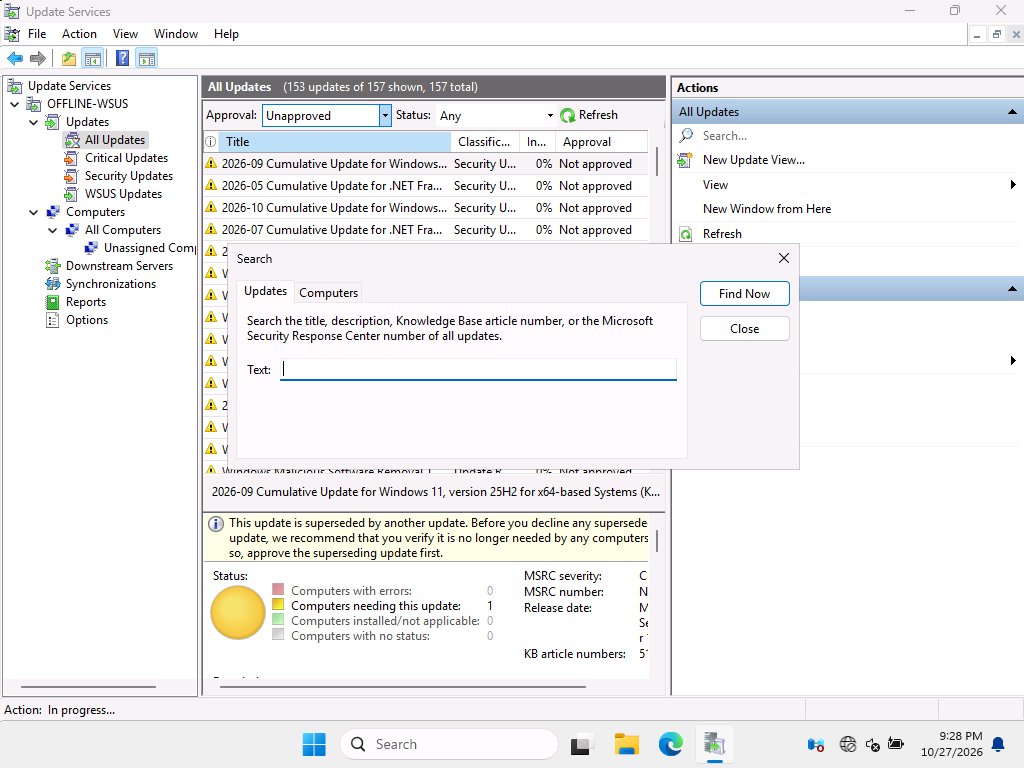
Search dialog. It searches the title, description and KB number. WSUS marks every month except the newest as superseded and shows a yellow warning. That does not stop you approving an older one.
-
Check the size CLI
Online server
Select the update, then click File Information in the Actions pane. This lists every file with its size, as the next screenshot shows. The total, and which files you already hold, needs script 2. Expect about 5 GB new. If it is much larger, stop and find out why. Make sure free space is at least double the new size (files plus the carry archive).
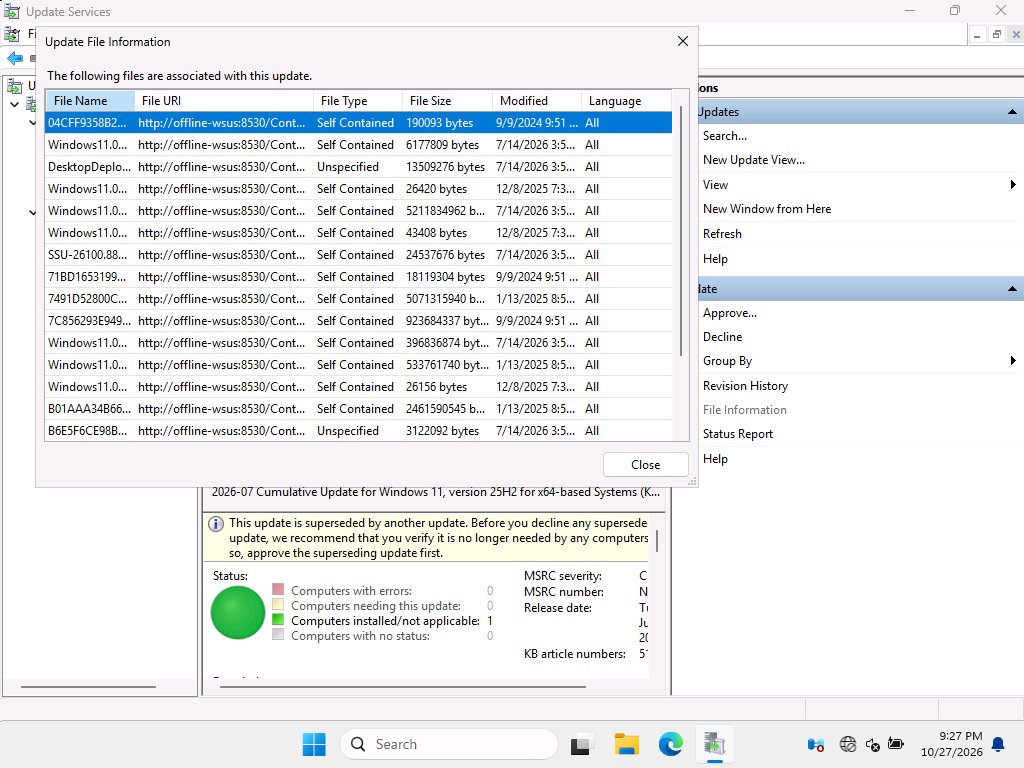
File Information for the July update. The columns are file name, source, type, size and date. -
Take a safety copy GUI
Hyper-V host, both servers and the test client
Open Hyper-V Manager. Click 1 the virtual machine, then in the Actions pane click 2 Checkpoint. A checkpoint appears in the Checkpoints box under the list. To go back later, select the checkpoint and click 3 Revert… (on the VM's own actions), or right-click the checkpoint and choose Apply….
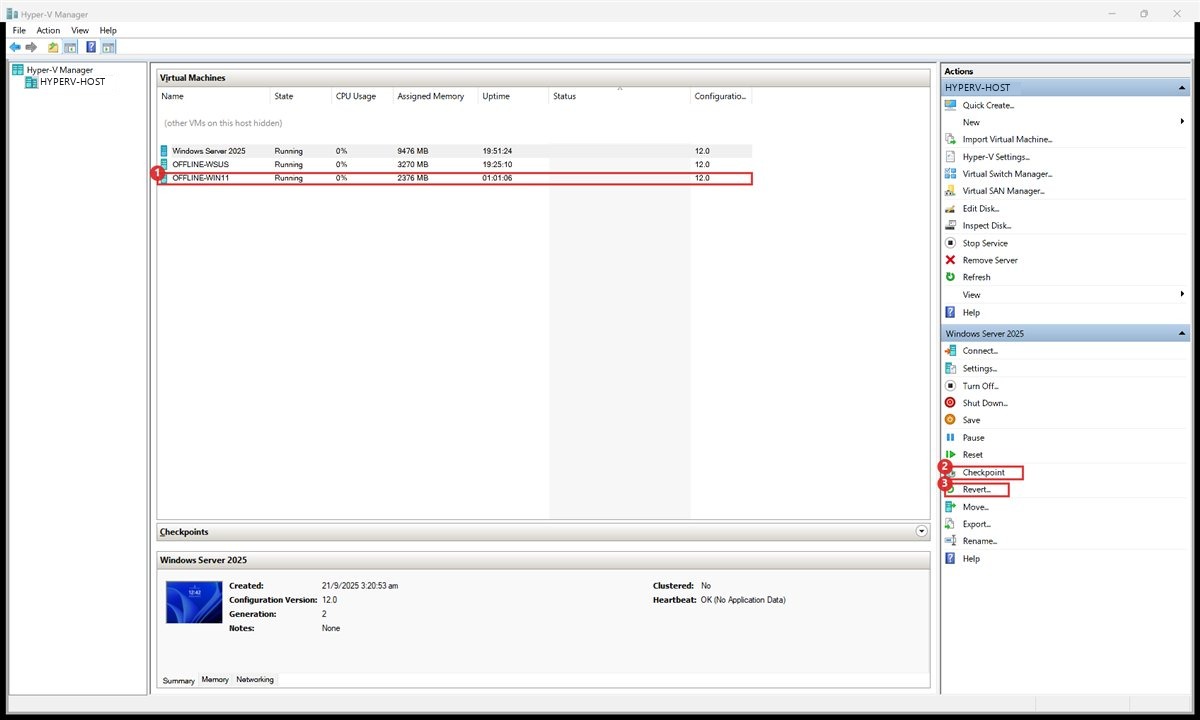
Hyper-V Manager. The Actions pane changes to match the selected VM. We hid our other VMs in this picture. Check it exists
Our VMs had checkpoints turned off, and the first attempt failed with "Checkpoints have been disabled". Open the VM's Settings, Management, Checkpoints and tick Enable checkpoints. Then look in the Checkpoints box to see the new one before you change anything. On physical machines use your backup tool.
-
Approve the update GUI
Online server, WSUS console
In the update list click 1 the update, then in the Actions pane click 2 Approve…. The right-click menu has the same Approve… and Decline.
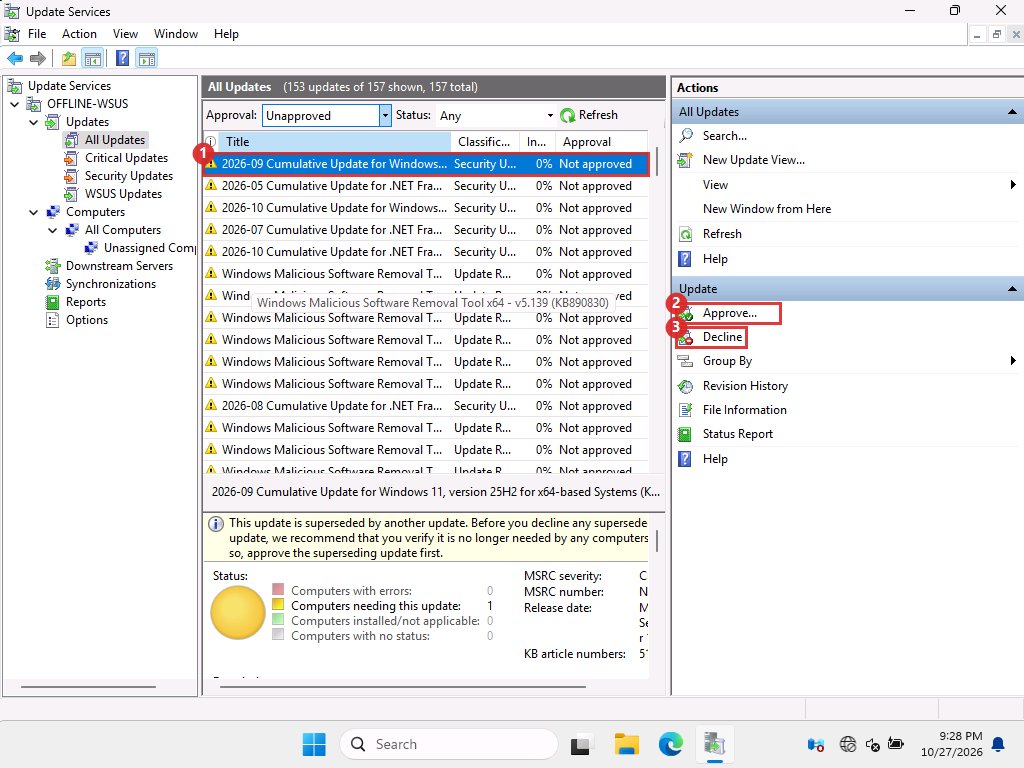
An unapproved update selected. Box 2 is Approve, box 3 is Decline. In the Approve Updates box, click the small arrow 1 next to All Computers.
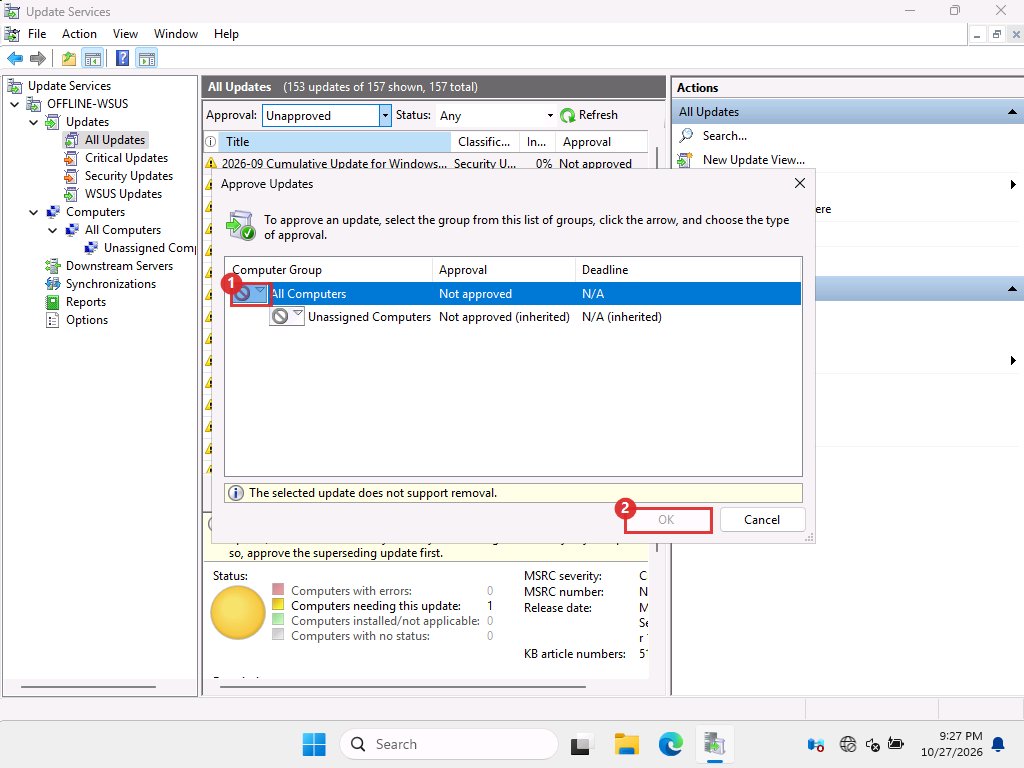
Approve Updates. OK stays grey until you choose something. Choose 1 Approved for Install, then click OK. A progress box appears. Click Close when it finishes.
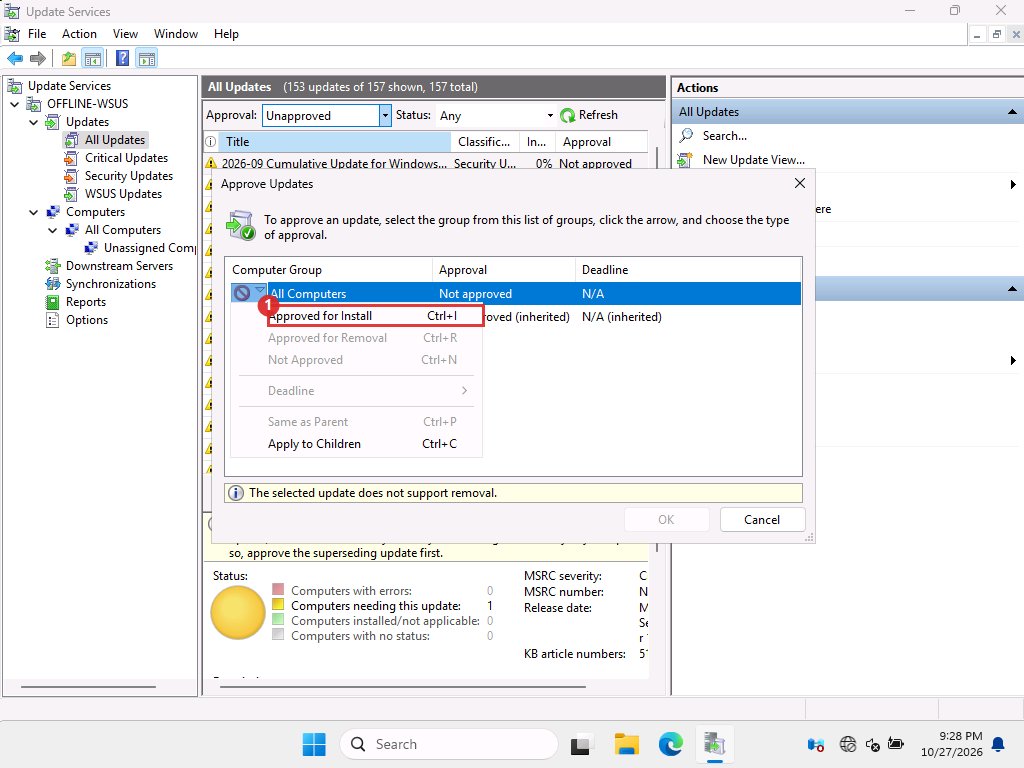
Menu from the arrow. "The selected update does not support removal" is normal for a cumulative update. Approve only this one update. Do not approve the whole list.
-
Watch the download CLI
Online server
WSUS now downloads the files. Watch with script 4, which prints how many of the update's files are complete. A healthy download finishes in a few minutes. If a file stays at 0 bytes, go to Fixing problems, first entry. Do not wait hours.
Not a re-download
The console and queue counters list every approved update as downloading. Only the missing files are fetched. Check what is missing with script 2.
-
Verify every file CLI
Online server
Run script 5. Every file's SHA-1 must equal its file name. Fix any mismatch before you carry anything.
-
Export the catalog CLI
Online server
powershellNew-Item -ItemType Directory C:\Transfer -Force | Out-Null & "$env:ProgramFiles\Update Services\Tools\wsusutil.exe" export C:\Transfer\export.xml.gz C:\Transfer\export.logThe file always holds the whole catalog. It was about 86 MB in our first runs, before we trimmed, and 3.1 MB afterwards with 181 updates. Read
export.logfor errors. -
Carry the new files and the catalog CLI or File Explorer
Online server, removable drive, offline server
Script 6 builds one archive of only the files the offline server lacks. Copy the archive and
export.xml.gzto the removable drive with File Explorer (copy, then paste on the drive), and later from the drive toC:\Transferon the offline server. In the lab, 5.4 GB took about 1.5 minutes per hop. -
Extract and verify on the offline server CLI
Offline server
Run script 7 to extract the archive into the content folder and compare every new file's SHA-1 with its name.
Order matters
Content first, catalog second. The offline server then finds every file already in place when it learns about the update.
-
Import the catalog CLI
Offline server
powershell& "$env:ProgramFiles\Update Services\Tools\wsusutil.exe" import C:\Transfer\export.xml.gz C:\Transfer\import.logWSUS stops while it imports. It takes a few minutes. Read
import.logafterwards.What we did differently
In the lab the offline server had already imported a catalog taken after the online server synced through October. June and July were already known, so we only carried files. In a real month you export and import every time. We tested a real catalog import with the small .NET update, and later with the Server 2025 product (a 3.1 MB export that took 0.4 minutes to import and took the offline catalog from 157 to 181 updates).
-
Trim old updates GUI for a few, CLI for many
Offline server, WSUS console
The import brings back every update in the catalog, including ones you declined last month. To hide the old ones, set Approval to Any Except Declined, select the old rows (click the first, hold Shift and click the last), and click Decline in the Actions pane. For the first trim, which can be hundreds of rows, script 8 does it in one go. See Cleanup and retention.
-
Approve on the offline server and check GUI
Offline server, WSUS console
Click All Updates, set Approval to Any Except Declined, click Refresh, and select the new month's update. Click Approve…, set All Computers to Approved for Install, then OK, exactly as in step 5. Then run
wsusutil reset(script 9) so the server registers the files.To check, select the update. The bottom pane shows Computers needing this update and, once clients install it, Computers installed/not applicable. Click File Information to confirm the files are listed.
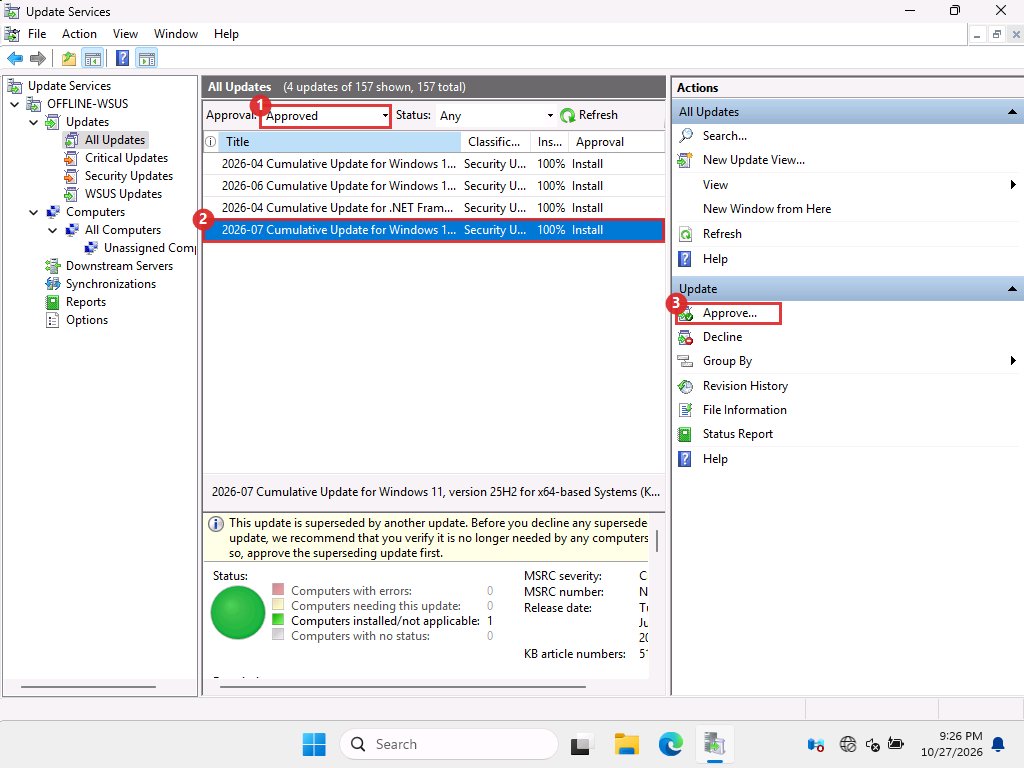
Approved updates on the offline server. Box 2 is the selected update. The green circle at the bottom means one computer has installed it. You can also right-click the update to get the same actions.
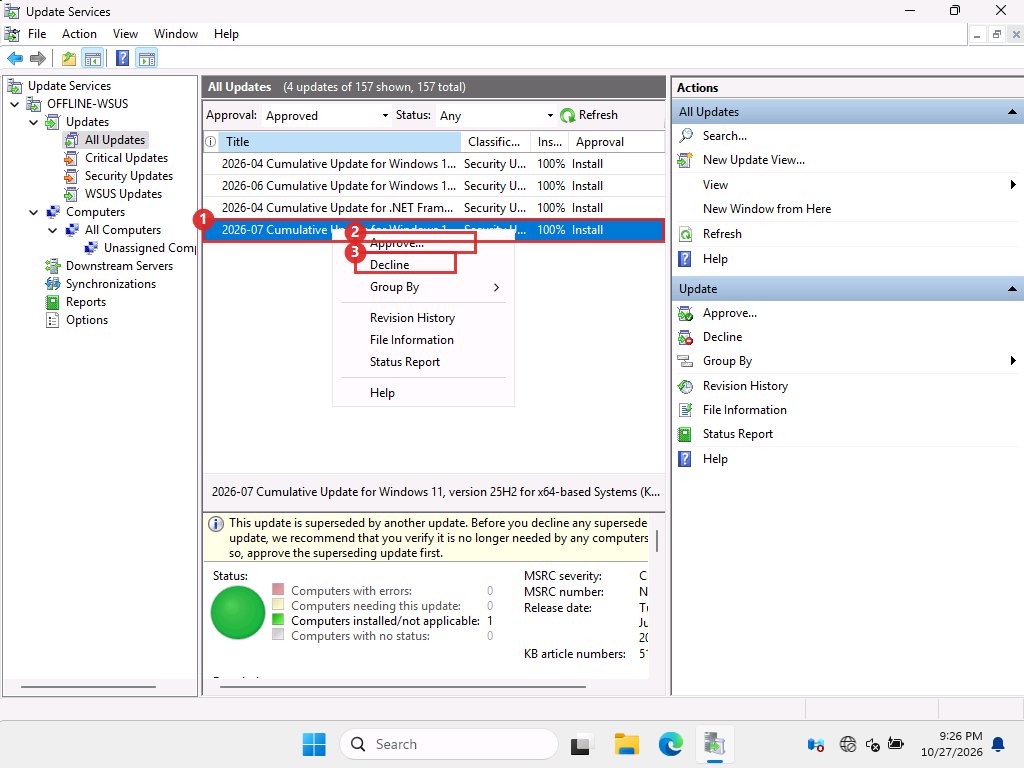
Right-click menu. Box 2 is Approve…, box 3 is Decline. -
See which computers have it GUI
Offline server, WSUS console
Click Computers, then All Computers. Click 1 the computer to see how many updates it needs and has installed.
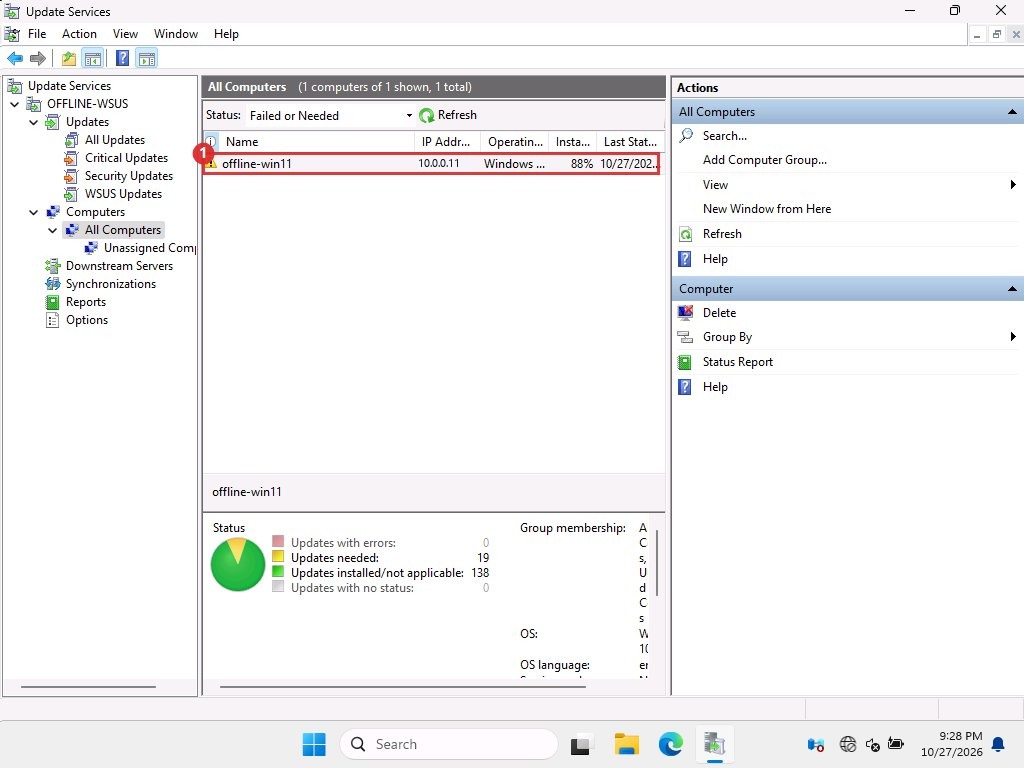
The client reports to the offline server. Columns include its IP address, operating system and last status report. -
Test, then roll out
Test client, then everyone
Install on the test client first (Installing on the client). Approve for the wider estate only after that client has booted and run for a day.
-
Clean up the transfer files GUI
Both servers and the removable drive
In File Explorer delete the archive and export files from
C:\Transferand from the drive. They were 18.8 GB per machine in our lab by the end. Do not touch the WSUS content folder.