Install on Ubuntu
PostgreSQL, TimescaleDB and pgAdmin on Ubuntu 22.04 LTS, from the project's apt repositories.
Tested on
Ubuntu 22.04.4 (jammy), PostgreSQL 14.10, TimescaleDB 2.13.1, pgAdmin 4 version 8.2, from the Setup PDF. The host needs internet access. Replace 14 in the package names with the PostgreSQL version you install.
Check the Ubuntu version first: Settings, then About. The lab host was Ubuntu 22.04.3 LTS, 64-bit.
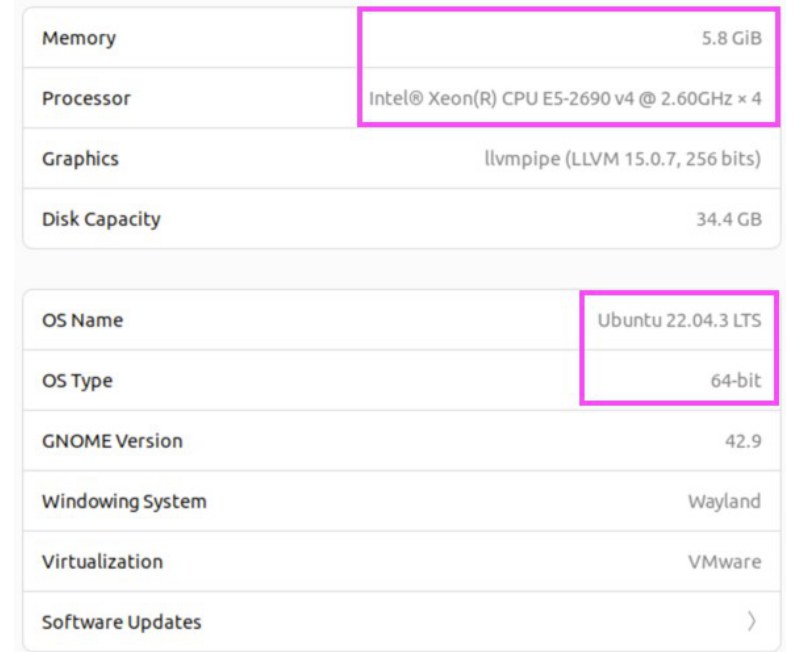
1. Install PostgreSQL
sudo apt install gnupg postgresql-common apt-transport-https lsb-release wget
sudo /usr/share/postgresql-common/pgdg/apt.postgresql.org.sh
The second command enables the official PostgreSQL repository. Press Enter when it asks.
2. Add the Timescale repository and install TimescaleDB
echo "deb https://packagecloud.io/timescale/timescaledb/ubuntu/ $(lsb_release -c -s) main" | sudo tee /etc/apt/sources.list.d/timescaledb.list
wget --quiet -O - https://packagecloud.io/timescale/timescaledb/gpgkey | sudo gpg --dearmor -o /etc/apt/trusted.gpg.d/timescaledb.gpg
sudo apt update
sudo apt install timescaledb-2-postgresql-14
3. Tune PostgreSQL for TimescaleDB
timescaledb-tune edits postgresql.conf for the machine's memory and CPU. Answer y to every question.
It asks, in order:
- Is this the right
postgresql.conf? The path is/etc/postgresql/14/main/postgresql.conf. - Add
shared_preload_libraries = 'timescaledb'? This one is required. Without it the extension cannot load. - Tune memory, parallelism, WAL, background writer and miscellaneous settings? The recommendations depend on the machine. The lab had 5.78 GB of memory and 4 CPUs, and the tool chose
shared_buffers = 1479MB,max_connections = 75and 16 TimescaleDB background workers.
Keep the backup
It writes a backup first, for example /tmp/timescaledb_tune.backup202402012318. Copy it somewhere safe if you want a way back.
4. Install the psql client
The lab's apt installed client version 16 against server version 14. The psql banner warns about the mismatch but it works.
5. Restart PostgreSQL and start it at boot
6. Install pgAdmin 4
pgAdmin is the graphical database editor used in the rest of this guide.
sudo snap install curl
curl -fsS https://www.pgadmin.org/static/packages_pgadmin_org.pub | sudo gpg --dearmor -o /usr/share/keyrings/packages-pgadmin-org.gpg
sudo sh -c 'echo "deb [signed-by=/usr/share/keyrings/packages-pgadmin-org.gpg] https://ftp.postgresql.org/pub/pgadmin/pgadmin4/apt/$(lsb_release -cs) pgadmin4 main" > /etc/apt/sources.list.d/pgadmin4.list && apt update'
sudo apt install pgadmin4 -y
The i386 message from apt update is harmless.
To use it: click Show Applications, then pgAdmin4. Right-click Servers, choose Register, then Server…, enter a name, open the Connection tab, fill in the connection details and click Save.
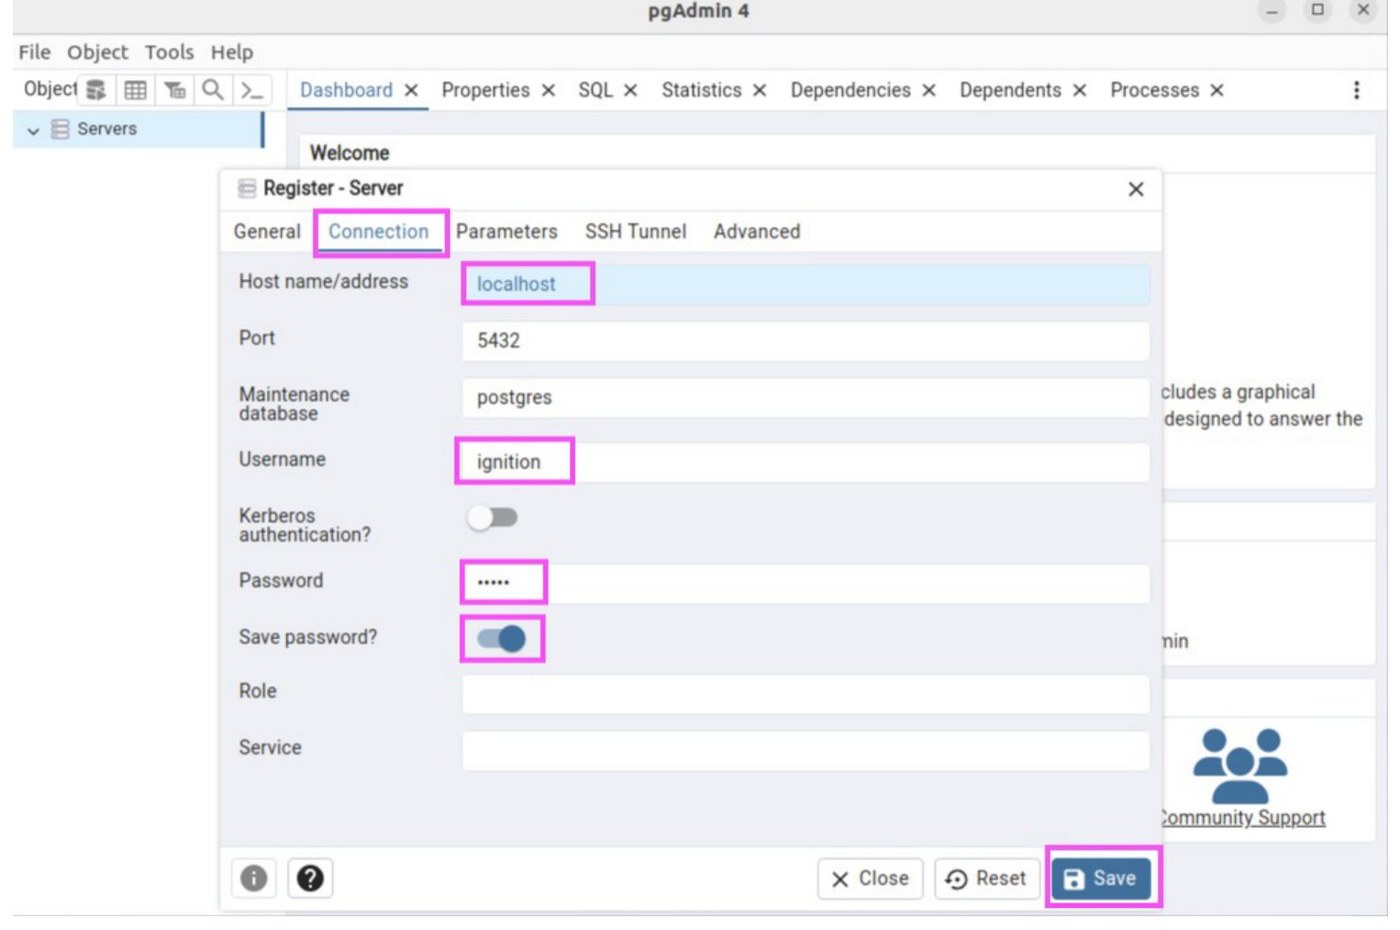
localhost when pgAdmin runs on the database host), the user, the password, Save password and Save.Expand the tree to the tsdb database once it exists, and click it.
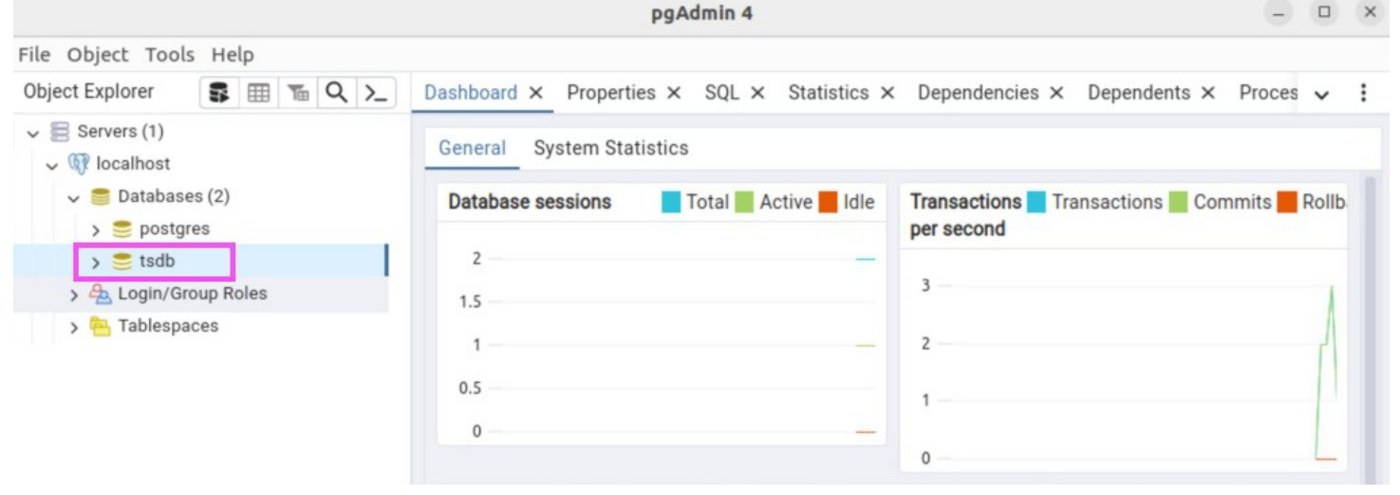
tsdb node in Object Explorer.PostgreSQL and pgAdmin are now installed. Next: create the Ignition user and database, and allow the Gateway to connect.